Genuary 2025 - my creative coding comeback!
A series of generative (and occasionally interactive) experiments done in response to the Genuary proposal to code beautiful artworks during the month of January. More information about Genuary.
It's the first time I've participated to this call for art and it's being super challenging for me but I'm learning a lot and iterating a lot, sometimes waking up in the middle of the night to scribble up a mathematical function on a lose paper!
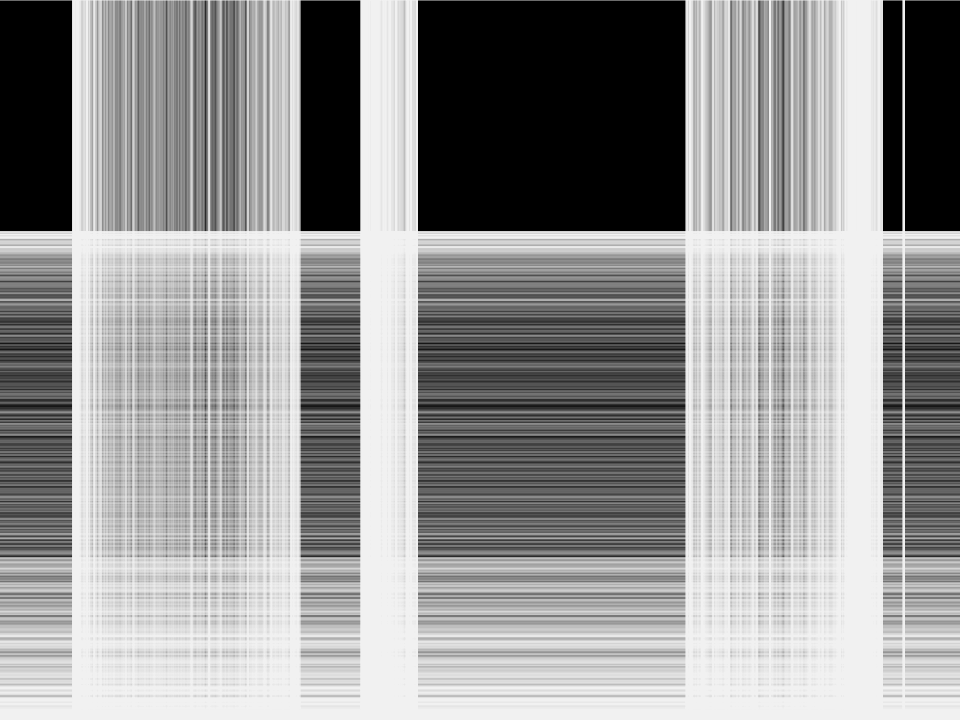
Genuary 1: Vertical or horizontal lines only. #genuary1 #genuary #processing
I interpreted this prompt my way: you can either draw horizontal lines or vertical lines but not both at the same time [insert mischievous grin emoji].
// Ariel Martín Pérez
// https://tainome.com/
// https://arielmartinperez.com/
// Documentation: https://processing.org/reference

import processing.pdf.*;

boolean isOn = false;

void setup() {
  size(960, 720);
  beginRecord(PDF, "lines.pdf");
  fill(0);
  rect(0,0,width,height);
}

void draw() {
  stroke(245, 90);
  strokeWeight(0.5);
  smooth();
if (isOn) {
    line(mouseX, 0, mouseX, height);
  } else {
    line(0, mouseY, width, mouseY);
  }
}

void mousePressed() {
  // Toggle the coordinate system when the mouse is clicked
  isOn= !isOn;
}

void keyPressed() {
  if (key == 'o') {
    endRecord();
    exit();
  }
}
Instructions: copy this code and paste it into Processing (a free and open-source creative code tool). Save the code into a file in your computer by using the File -> Save As menu in the Processing app (code files are called "sketches" in Processing). Run the code by pressing the play button. Drag your mouse on the black area to draw thin white horizontal lines. Clicking the mouse will switch the drawing mode to vertical lines. Tip: to avoid filling the drawing area with vertical or horizontal lines, drag your mouse above existing lines to acess other parts of the drawing without adding new lines. When you'll be happy with your result, press the letter "o" on your keyboard. It will close the drawing screen and generate a pdf file called "landscape.pdf" (that will appear on the same folder of your computer where you saved your Processing code file or "sketch").
Desktop browser instructions: Click anywhere on the black area above to draw thin white horizontal lines. Clicking again with the mouse will switch the drawing mode to vertical lines. Tip: to avoid filling the drawing area with vertical or horizontal lines, drag your mouse above existing lines to acess other parts of the drawing without adding new lines. Mobile browser instructions: tap anywhere and drag your fingertip on the black area above to draw horizontal lines. Tap and drag again to draw vertical lines.
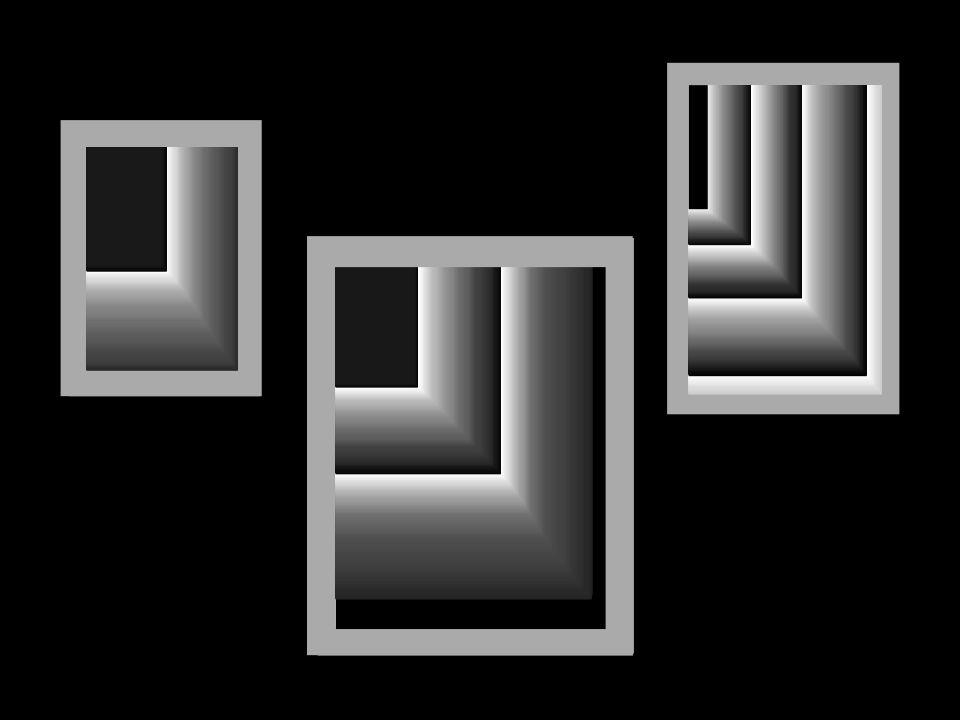
Genuary 2: Layers upon layers upon layers. #genuary2 #genuary #processing
This sketch is partially based on the default Processing reference documentation and of the work of Niko on OpenProcessing.
// Ariel Martín Pérez
// https://tainome.com/
// https://arielmartinperez.com/
// Documentation: https://processing.org/reference

import processing.pdf.*;

int c=0, x, y;

void setup(){
  size(960,720);
  beginRecord(PDF,"layers.pdf");
  fill(0);
  rect(0,0,960,720);
  noStroke();
}

void draw(){
  fill(c);
}

void mousePressed(){
  x=mouseX;
  y=mouseY;
}

void mouseDragged(){
  rect(x,y,mouseX-x,mouseY-y);
  c=c+1;
  if (c>255){
    c=0;
  }
}

void mouseReleased(){
rect(x,y,mouseX-x,mouseY-y);
}

void keyPressed(){
  if (key=='o'){
    endRecord();
    exit();
  }
}
Instructions: copy this code and paste it into Processing Save the code into a file in your computer by using the File -> Save As menu in the Processing app. Run the code by pressing the play button. Click and drag your mouse to draw shapes with gradients. Experiment. When you'll be happy with your result, press the letter "o" on your keyboard. It will close the drawing screen and generate a pdf file called "layers.pdf" (that will appear on the same folder of your computer where you saved your Processing code file or "sketch").
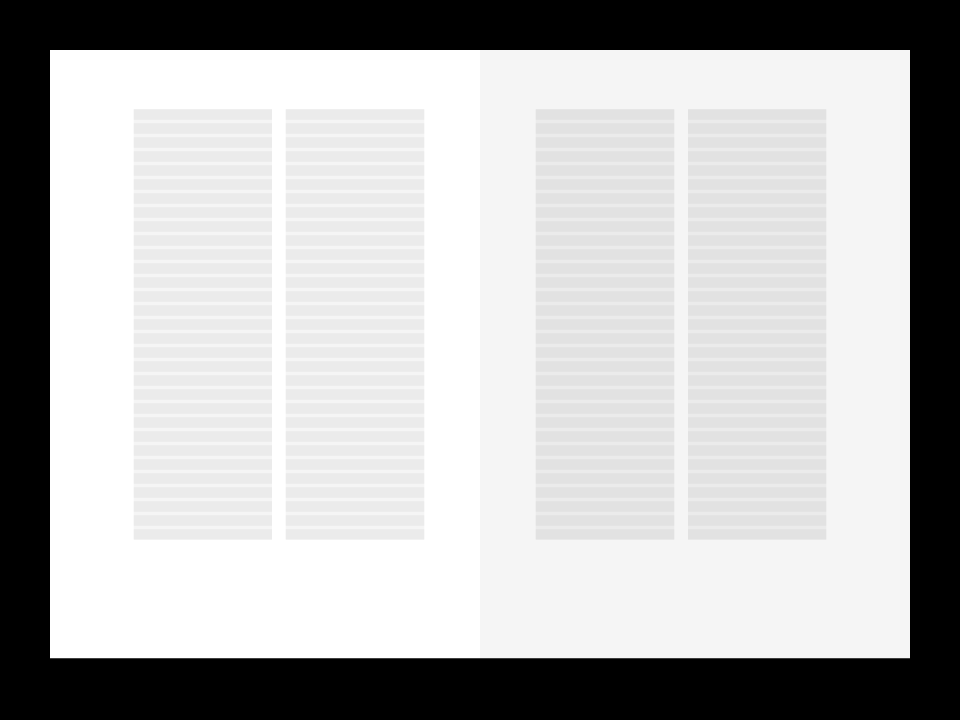
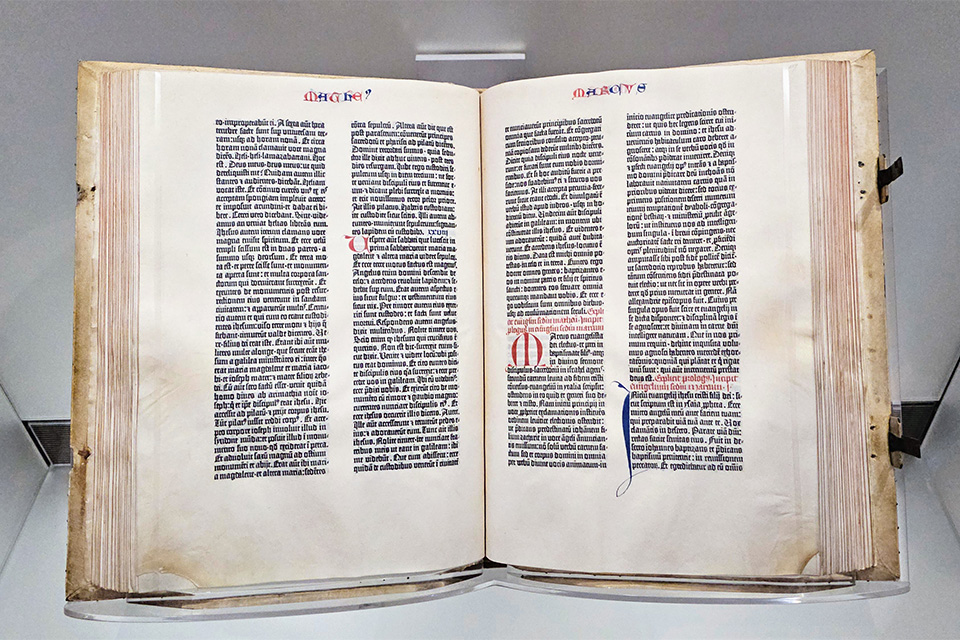
Photo: CC0 MC BSU, 2024, Gutenberg's Bible on display at the U.S. Library of Congress (modified).
Genuary 3: Exactly 42 lines of code. #genuary3 #genuary #processing
A dynamically generated layout of Gutenberg's B42 Bible (except for the leading, which needs to be set manually as I can't put a float into a "for" loop) in only 42 lines of Processing code. Proportions are as accurate as possible (folio proportions, text area ratio, text area margin proportions, gutter width, number of text lines).
What I like about this code is that it features the square root of 2 twice. The proportions of the folios of the B42 are 1:sqrt(2). Also, in medieval books, the written area is usually half of the folio area (which gives ample space for marginalia & for holding the book without damaging the written letters). In order to calculate it, you also need the square root of 2.
import processing.pdf.*;
float m, pre, pro, sc, w, h, x, y, a, b, g, lw;
String s = "Text area height is ";
void setup() {
  size(960, 720);
  beginRecord(PDF, "b42.pdf");
  fill(0);
  noStroke();
  rect(0, 0, width, height);
  noLoop();}
void drawBook() {
  fill(255);
  m=50; //desired background margin
  pre = (width/2)-50; //folio width (automatic)
  pro = pre*sqrt(2); //folio height (automatic)
  rect(m, m, pre, pro);
  fill(0,10);
  sc=(1/sqrt(2)); //text area scale factor
  w=pre*sc; //text area width
  h=pro*sc; //text area height
  x=2*((pre-w)/3); //text area x position within the folio
  y=(pro-h)/3; //text area y position within the folio
  g=(2*((pre-w)/3))/3; //gutter between columns - 1/3 of the outer margin (automatic)
  lw=w/2-g/2; //column width (automatic)
  rect(m+x, m+y, lw, h);
  rect(m+x+lw+g/2, m+y, lw, h);
  for(int i=0; i<430; i=i+14){ //you need to set i values based on text area/line height
  rect(m+x, m+y+i, lw, h/42);
  rect(m+x+lw+g/2, m+y+i, lw, h/42);}}
void draw(){
  pushMatrix();
  drawBook();
  popMatrix();
  pushMatrix();
  translate(width, 0);
  scale(-1, 1);
  drawBook();
  popMatrix();
  rect(width/2, 0, width/2, height);
  print(s);
  print(h, "px and the line height is", h/42, "px");
  endRecord();}
Genuary 4: Black on black. #genuary4 #genuary #html #css #js #svg
A little audio experiment made with Javascript and Web Audio API.
Desktop instructions: Click anywhere on the black rectangle (directly above this text) once to activate the oscillator.
If your computer's sound is activated, you should hear a high pitched sound when you hover your mouse over the black area.
On mobile, tap anywhere on the black rectangle above to hear different high pitched sounds.
It should work on any web browser, except Internet Explorer and Opera Mini.

Genuary 5: Isometric art. #genuary5 #genuary2025 #genuary #html #css #js #ASCII
A super-minimalist ASCII art editor with isometric-looking hexagons. You can click on any hexagon to fill them out and to try to draw something. It strictly uses symbols contained in the original 1977 ASCII glyphset. Also recalls 2024's January 9th prompt ("ASCII"), that I didn't have the chance to participate to.
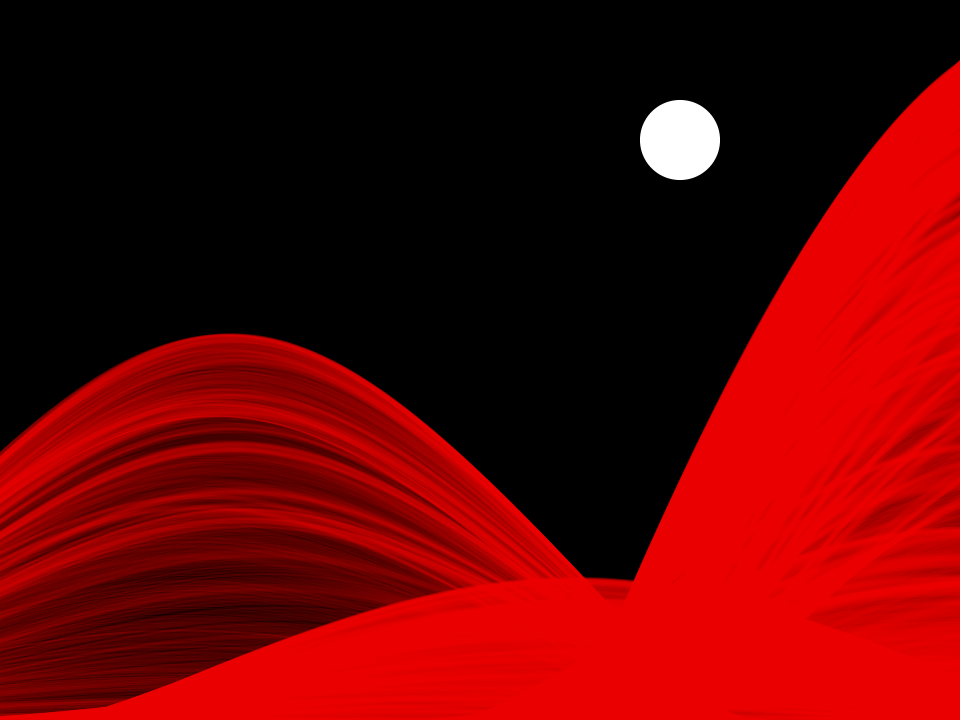
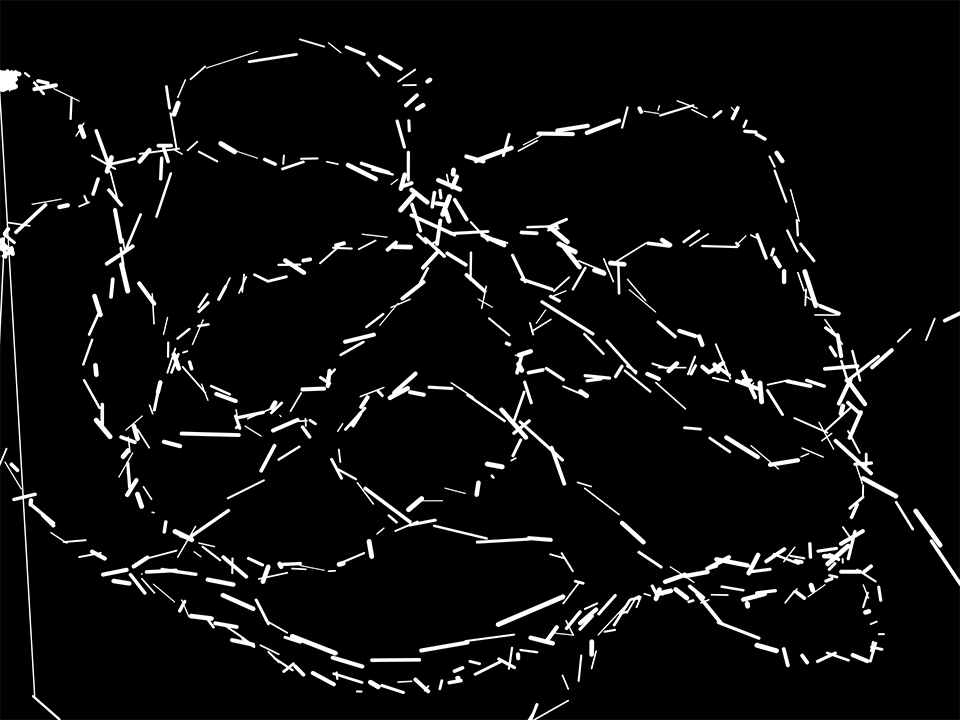
Genuary 6: Make a landscape using only primitive shapes. #genuary6 #genuary2025 #genuary #processing #primitiveshapes #bezier #yugen
A poetic drawing tool that exclusively draws infrared, nocturnal landscapes made of gently rolling hills lit by the supernatural glow of the moon. All the shapes you can draw are made of Bezier curves, of which the end points and middle points are determined by the position of your mouse. I envision it as a representation of Japanese aesthetics' concept yūgen (mysterious beauty).
// Ariel Martín Pérez
// https://tainome.com/
// https://arielmartinperez.com/
// Documentation: https://processing.org/reference

import processing.pdf.*;

float spx, epx, x0, x1, y, st = 0.25;

void setup() {
  size(960, 720);
  beginRecord(PDF, "landscape.pdf");
  fill(0);
  noStroke();
  smooth();
  rect(0, 0, width, height);
  fill(255);
  ellipseMode(CORNER);
  ellipse(width-320, 100, 80, 80);
  bezierDetail(200);
}

void draw() {
  noFill();
  stroke(240, 0, 0, 20);
  strokeWeight(st);
  x0 = mouseX-(0.1*mouseX);
  x1 = mouseX+(0.1*mouseX);
  y = mouseY;
  //noStroke();
  //fill(0,1);
  //rect(0, 0, width, height);
}

void mousePressed() {
  st = st + 1;
  if (st > 100) {
    st = 0;
  }
}

void mouseDragged() {
  noFill();
  stroke(240, 0, 0, 20);
  strokeWeight(st);
  spx = mouseX-width/2; //starting point of the bezier in the x axis
  epx = mouseX+width/2; //ending point of the bezier in the x axis
  bezier(spx, height, x0, y, x1, mouseY, epx, height);
}

void keyPressed() {
  if (key == 'o') {
    endRecord();
    exit();
  }
}
Instructions: copy this code and paste it into Processing (a free and open-source creative code tool). Save the code into a file in your computer by using the File -> Save As menu in the Processing app (code files are called "sketches" in Processing). Run the code by pressing the play button. Click anywhere on the black background and drag your mouse to start drawing red, ethereal hills. When you'll be happy with your result, press the letter "o" on your keyboard. It will close the drawing screen and generate a pdf file called "landscape.pdf" (that will appear on the same folder of your computer where you saved your Processing code file or "sketch").
Genuary 7: Use software that is not intended to create art or images. #genuary7 #genuary2025 #genuary #openSCAD #maths #cosine
OpenSCAD is a program that generates 3D objects solely from code instructions, which is often used to create simple models for 3D printing and CNC (milling). While it does have a 3D preview window, its intended use is to check out your 3D models before exporting, not to create art with it.
for(i=[-36:36])
  for (j=[-36:36])
    translate([i * 10 - 1, j * 10 - 1, rndval()])
      cylinder(r=5,h=(cos(i*10)*cos(j*10)*50+60)*5);

// Randomness function
function rndval() = ceil(rands(-10, 20, 1)[0]);
Here, I coded a little script that shows a series of cylinders of which the height follows a cosine wave, with just a little touch of randomness (if you don't want it, you can just delete the ", rndval()" part from the "translate" line, and the Randomness function, and you're good to go). Later, I screen-captured several frames and animated them using Photoshop. I like that it looks like a sound wave (I'll maybe add some sound to it later).
PS: OpenSCAD has a time variable that can be used in-app to check out the correct operation of mechanical parts in the form of an animation, but I didn't have time to study it properly on a single day.
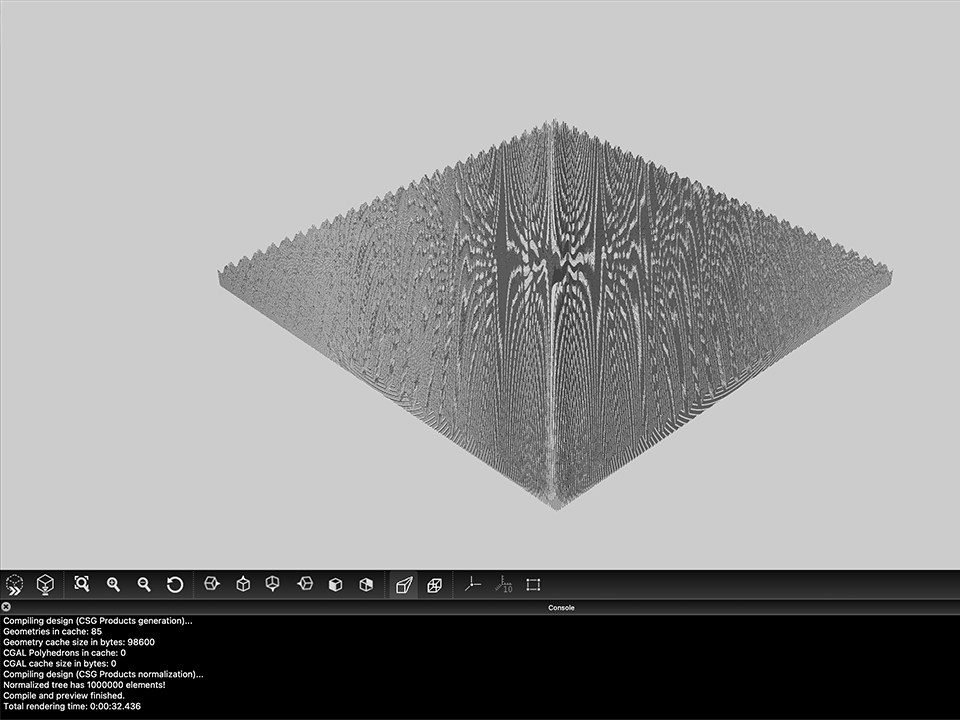
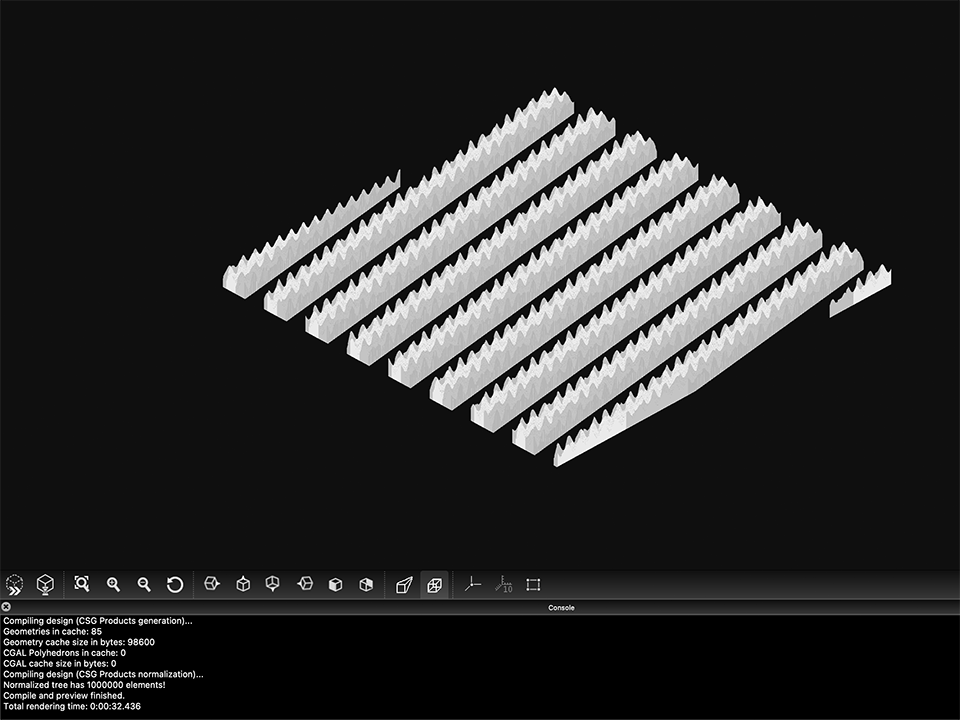

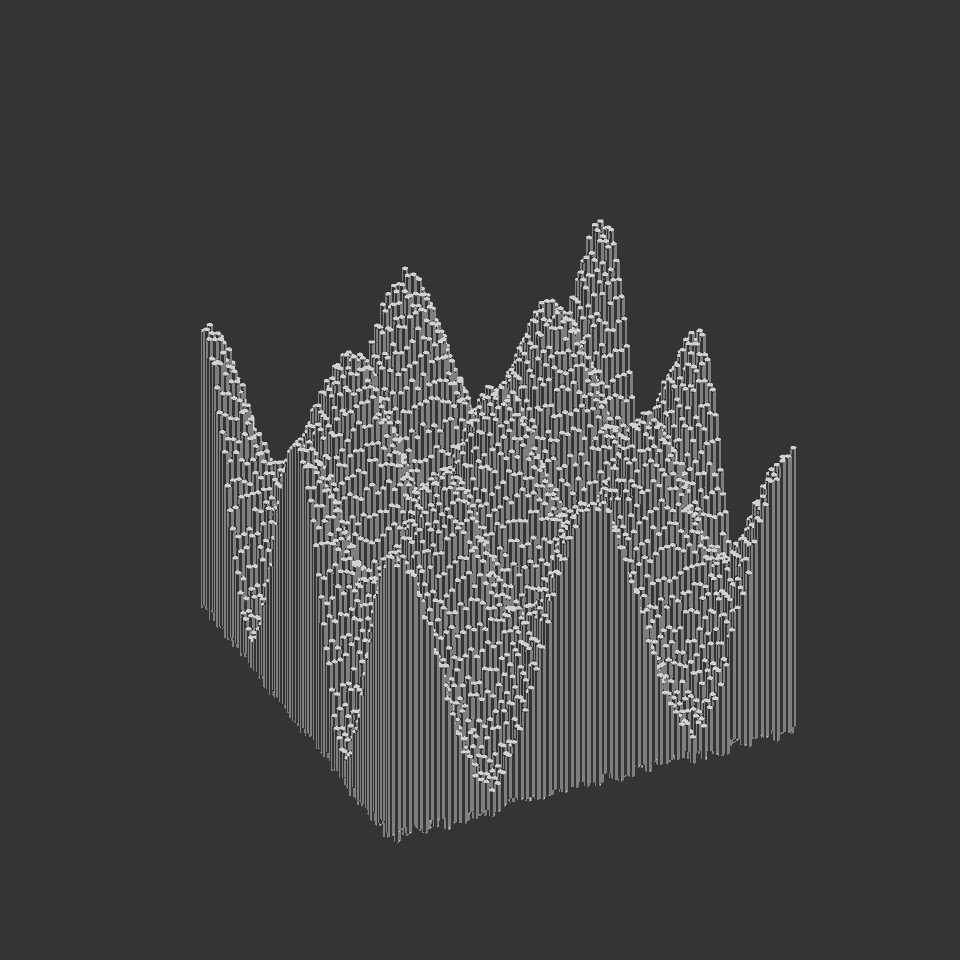
Genuary 8: Draw one million of something. #genuary8 #genuary2025 #genuary #openSCAD #maths #amilli
for (i = [-500:499]) // 1000 steps
    for (j = [-500:499]) // 1000 steps
        translate([i * 10 - 1, j * 10 - 1, rndval()])
        	cylinder(r = 2, h = cos(i * 10) * cos(j * 10) * 200 + 300);

// Randomness function
function rndval() = sin(ceil(rands(-100, 200, 1)[0]));
This deceptively simple code will generate one million low-poly cylinders in OpenSCAD, in a 1000 * 1000 grid. Before you can preview the 3D model, you'll first need to go to OpenSCAD's Preferences -> Advanced -> Turn of rendering at 1000001 elements. Here are some previews in normal and oblique projections. I like the moiré patterns that result from the accumulation of very narrow cylinders.
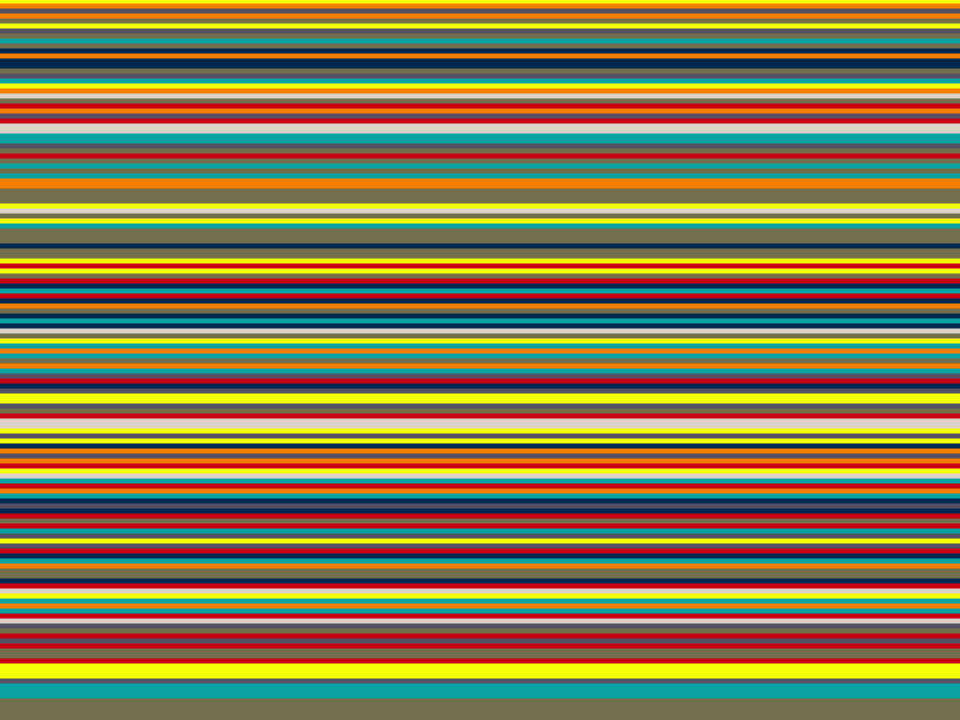
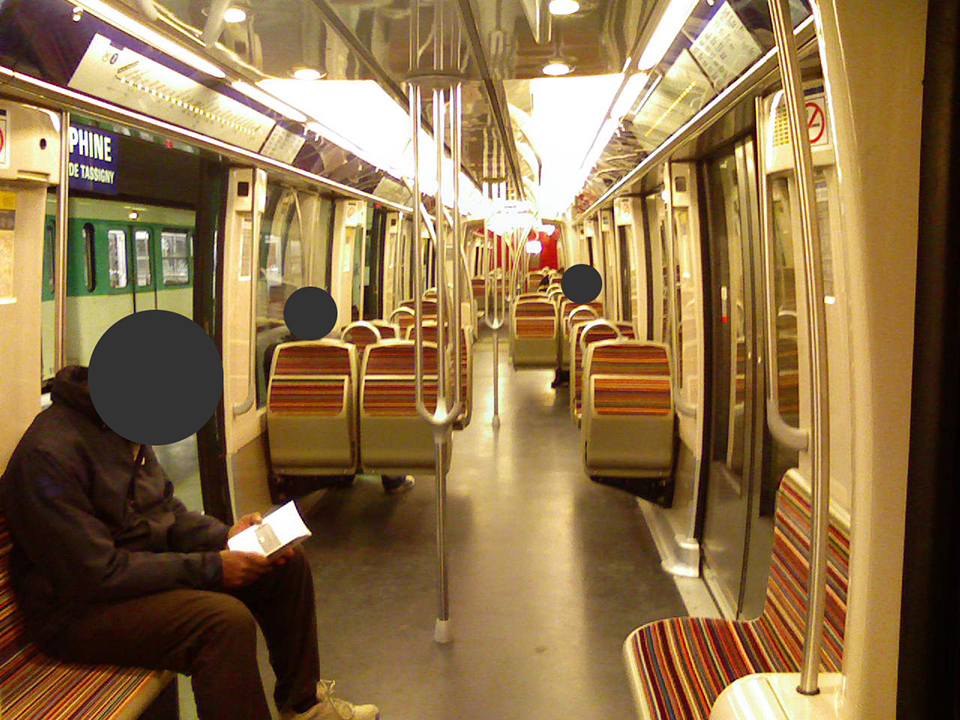
Photo: CC BY SA Yios, 2007, interior of line 2 of the Paris metro (modified).
Genuary 9: The textile design patterns of public transport seating. #genuary9 #genuary2025 #genuary #processing #paris #metro #parismetro
A simple color strip generator inspired by the most commonly seen Paris metro seats (even if other patterns and colors exist in the network). Their palette was designed by Nadine Cahen, according to her website. Have you noticed that the width of the colored stripes in the metro seat tissue pattern has decreased over time? No doubt to discourage taggers who would want to leave their mark on the tissue. If you're interested in the design of transportation seat textiles, I recommend this video (en français).
// Ariel Martín Pérez
// https://tainome.com/
// https://arielmartinperez.com/
// Documentation: https://processing.org/reference

import processing.pdf.*;

void setup() {
  size(960, 720);
  beginRecord(PDF, "parismetroseatpattern.pdf");
  fill(200);
  noStroke();
  smooth();
  rect(0, 0, 960, 720);

  strokeWeight(random(5, 40));
  for (int i=0; i<height; i=i+5) {
    setRandomStroke(); // Pick a random fill color
    line(0, 0+i, width, 0+i);
  }
  endRecord(); // Save the current frame to the PDF
}

void setRandomStroke() {
  color[] colors = {
    color(245, 125, 0), // orange
    color(0, 40, 80), // deep blue
    color(245, 255, 5), // yellow
    color(10, 163, 163), // turquoise
    color(200, 2, 18), // dark red
    color(220, 210, 200), // light beige white
    color(85, 80, 100), // dark cold grey
    color(115, 110, 75) // dark green
  };
  stroke(colors[int(random(colors.length))]); // Set random color
}

void keyPressed() {
  if (key == 'o') {
    exit();
  }
}
Instructions: Each time you launch the generator in Processing, a random combination of stripes is produced, which is automatically saved as a pdf file. Press key "o" to exit the display screen. The colors are picked from a series of fixed values, but as color values vary wildly depending on lighting conditions (specially under artificial light), some design choices had to be made.
Online instructions: Each time you'll reload this page, a different, random strip pattern will appear above this text.
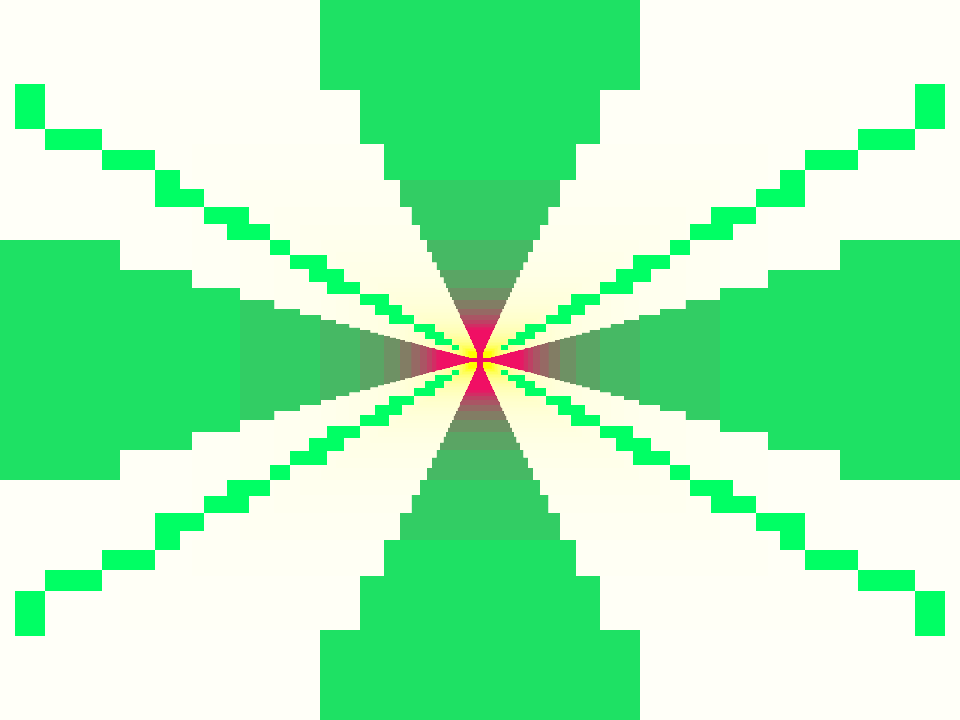
Genuary 11: Impossible. #genuary11 #genuary2025 #genuary #javascript #js #impossible
I'm a newbie in creative coding, so in fact most creative code projects seem totally impossible to me at the moment, even the most simple ones. So I decided to take this prompt in a quirky way. Sometimes, when we're passing through a rough phase of our lives, everything seems impossible, even doing the most simple things can seem like an insourmontable mountain to climb. So, when you're feeling this way, sometimes you need to change your perspective. Hover your mouse over the above picture to find out.


Genuary 13: Triangles and nothing else. #genuary13 #genuary2025 #genuary #processing #triangles #landscape #primitiveshapes
Another landscape generator, that only draws triangles, but this time they're so thin (and closely aligned, or so thoroughly rotated) that they become something else. This generator also echoes my entry for Genuary 6, and could have been an answer to that.
// Ariel Martín Pérez
// https://tainome.com/
// https://arielmartinperez.com/
// Documentation: https://processing.org/reference

import processing.pdf.*;

float spx, epx, x0, y0, x1, y1, st = 0.25;

void setup() {
  size(960, 720);
  beginRecord(PDF, "triangles.pdf");
  fill(250);
  noStroke();
  smooth();
  rect(0, 0, 960, 720);
  fill(0);
  translate(width-280, 142);
  for (int i = 0; i < 360; i = i+1) {
    rotate(i);
    triangle(0, 20, 20, 0, 40, 20);
  }
}

void draw() {
  x0 = mouseX-(0.1*mouseY);
  x1 = mouseX+(0.1*mouseY);
  y0 = height+10;
  y1 = height+10;
}

void mousePressed() {
  st = st + 1;
  if (st > 35) {
    st = 0;
  }
}

void mouseDragged() {
  fill(0, 150, 220+st, 30);
  triangle(x0, y0, mouseX, mouseY, x1, y1);
}

void mouseReleased() {
  fill(250, 15);
  rect(0, 0, 960, 720);
    fill(0);
  translate(width-280, 142);
  for (int i = 0; i < 360; i = i+1) {
    rotate(i);
    triangle(0, 20, 20, 0, 40, 20);
  }
}

void keyPressed() {
  if (key == 'o') {
    endRecord();
  }
}
Instructions: Copy and execute the code in Processing, run the sketch, click and drag to draw ethereal hills in this frozen land under the black sun.

Genuary 14: Pure black and white. No gray. #genuary14 #genuary2025 #genuary #processing #blackandwhite #threshold #accident #goo #blobs
When I first read this prompt, I thought... what's black and white in our natural world? And then I thought of the fur patterns in Holstein cows (artificially bred, surely, but natural enough). I wanted to create a sort of generator of random rounded splotchs on a white background. In order to do that, as there is no rounding filter built in Processing that directly converts polygons to rounded shapes, I had to find a turnaround, which is turning the vectors on the screen to a pixel image and then applying a blur effect and a threshold filter (so everyting turns to 100% pure black and white values). But while doing that, I accidentally created this eldritch monstruosity that will progressively fill your screen left to right with black goo, and then with white goo. Enjoy!
// Ariel Martín Pérez
// https://tainome.com/
// https://arielmartinperez.com/
// Documentation: https://processing.org/reference

PImage capturedImage;

float a, b, c, d, e, f, bnw, fr;

void setup() {
  size(960, 720);
  background(255);
  noStroke();
  smooth();
  bnw = 0; //triangle color = black
}

void draw() {

  pushMatrix();

  translate(random(200), random(200));
  rotate(random(10));
  scale(random(5));

    if (frameCount<100) {  // When Framecount is less than 100...
    bnw = 0;  //...the triangles color remains black
  } else {
    bnw = 255;//Afterwards, they turn white
  }

  // Draw random triangles
  for (int i = 0; i < 20; i++) {
    fill(bnw);

    a=random(width/random(2));
    b=random(height/random(2));
    c=random(width/random(2));
    d=random(height/random(2));
    e=random(width/random(2));
    f=random(height/random(2));

    triangle(a, b, c, d, e, f);
  }

    println(frameCount);

  popMatrix();

  // Capture the current screen to a PImage
  capturedImage = get();

  // Process the image
  capturedImage.filter(BLUR, 10); // Apply a blur filter
  capturedImage.filter(THRESHOLD, 0.5); // Apply a threshold filter

  // Display the processed image
  image(capturedImage, 0, 0);

  // Save each frame as line-000001.png, etc.
  saveFrame("line-######.png");
}

void keyPressed() {
  if (key == 'o') {
    endRecord();
    exit();
  }
}
Instructions: Copy and paste the code in Processing, save the sketch (Processing file) somewhere in your computer, run the sketch. The folder where you saved your file will automatically fill with frames of the images you're seeing on the screen. Press the "o" key on your keyboard to end the recording process and exit the screen. You can then animate the frames with another app if you wish so.
Genuary 15: Design a rug. #genuary15 #genuary2025 #genuary #processing #rug #generativepalette
As the month advances, my workload for my actual paying job is starting to pile up and I'm falling behind on this creative challenge. So, after some tinkering, this code works for both Genuary 15 and 16 prompts: design a rug and generative palette (I'll see if I have the time to propose a different entry for Genuary 16, but I doubt it). The good part is that I'm really starting to get familiar with push and pop matrix.
// Ariel Martín Pérez
// https://tainome.com/
// https://arielmartinperez.com/
// Documentation: https://processing.org/reference

import processing.pdf.*;
float a, b, c, d;
void setup() {
  size(960, 720);
  beginRecord(PDF, "rug.pdf");
  fill(0);
  noStroke();
  rect(0, 0, width, height);
  noLoop();
}
void drawQuarterRug() {
  for (int i=2; i<255; i++) {
    fill(255, 255, 255-i);
    c=width/(i/2);
    d=height/(i/2);
    a=c;
    b=d;
    rect (a, b, c, d);
    fill(0, 255, 100);
    a=c*(c/2);
    b=d*(d/2);
    rect (a, b, c, d);
  }
}

void draw() {
  pushMatrix();
  for (int i=2; i<25; i++) {
    fill(0+i*10, 255-i*10, 100);
    rectMode(CENTER);
    rect (width/2, height/2, width/(i/2), height/(i/2));
  }
  popMatrix();

  pushMatrix();
  translate(width/2, height/2);
  scale(-1, 1);
  drawQuarterRug();
  popMatrix();

  pushMatrix();
  translate(width/2, height/2);
  scale(1, -1);
  drawQuarterRug();
  popMatrix();

  pushMatrix();
  translate(width/2, height/2);
  drawQuarterRug();
  popMatrix();

  pushMatrix();
  translate(width/2, height/2);
  scale(-1, -1);
  drawQuarterRug();
  popMatrix();

  endRecord();
}
Instructions: Copy and paste the code in Processing, save the sketch (Processing file) somewhere in your computer, run the sketch. A pdf file called "rug.pdf" will appear on the same folder of your computer where you saved your Processing code file or "sketch". You can play with the colors or the various multiplier values on the code to achieve cool results!
Genuary 17: What happens if pi=4? #genuary17 #genuary2025 #genuary #processing #pi #pinumber #goo
At first I didn't know how to tackle this prompt but while talking with my partner I found out that if the value of pi was any different, then the nature of mathematics itself would be radically unalike the one we know. That made me think of the plot of Liu Cixin's "Three Body Problem" books, where scientist are confronted with astonishing changes of the nature of physics. I first wanted to portray suicidal mathematicians but then I thought that it was quite a poor taste solution so I turned to a representation of an universe where the "circle is squaring" (as in, fusing with squares) and also the process is accelerating so the nature of the circle is degrading in time. The way this animation was designed, it could also work as an answer to Genuary prompts 4 (black on black) and 14 (pure black and white, no gray).
// Ariel Martín Pérez
// https://tainome.com/
// https://arielmartinperez.com/
// Documentation: https://processing.org/reference

PImage capturedImage;

float a, b, y, d, m, n, o, p, goop;

void setup() {
  size(960, 720);
  background(255);
  noStroke();
  smooth();
  y=0;
  a = width/2;  // position of the square
  b = height/2; // position of the square
  d = 100;      // diameter of the ball
  m=width-d;
  n=height-d;
  o=10; //width of the rectangles
  p=20; //height of the rectangles
  goop=255;
}

void drawBall() {
  fill(0);             //color of the ball
  ellipse(a, y, d, d); // ball
  y = y + 10;          //move the ball
  if (y >= height + d/2) {
    y = -d;            //return to top
  }
}

void draw() {
  //clean every frame
  fill(255, goop);
  rect(a, b, width, height);

  //draw central square and ball
  pushMatrix();
  fill(0);
  rectMode(CENTER);
  rect(a, b, 150, 150);
  drawBall();
  popMatrix();

  //draw array of rectangles
  for (int j=1; j<10; j++) {
    for (int i=1; i<20; i++) {
      fill(0);
      rectMode(CENTER);
      rect(m/i, n/j, o, p);
    }
  }

  //after 10 seconds, opacity
  //of the frame cleaner drops
  //and the ball becomes goopy
  if (millis() > 10000) {
    goop=100;
  }

  // Capture the current screen to a PImage
  capturedImage = get();
  // Apply a blur filter
  capturedImage.filter(BLUR, 5);
  // Apply a threshold filter
  capturedImage.filter(THRESHOLD, 0.5);
  // Display the processed image
  image(capturedImage, 0, 0);
  // Save each frame as line-000001.png, etc.
  saveFrame("line-######.png");
}

void keyPressed() {
  if (key == 'o') {
    endRecord();
    exit();
  }
}
Instructions: Copy and paste the code in Processing, save the sketch (Processing file) somewhere in your computer, run the sketch. The folder where you saved your file will automatically fill with frames of the images you're seeing on the screen. Press the "o" key on your keyboard to end the recording process and exit the screen. You can then animate the frames with another app if you wish so.
Genuary 18: What does wind look like? #genuary18 #genuary2025 #genuary #p5js #wind #blackonblack
This is my first p5.js code ever and I'm quite happy with it. It works directly on the browser, just hover your mouse on the black rectangle above and you'll see some debris being scattered by the wind. You can make a screen capture to save your creation. This sketch could also fill the prompt of Genuary 4, Black on Black.
// Ariel Martín Pérez
// https://tainome.com/
// https://arielmartinperez.com/
// Documentation: https://p5js.org/reference/

function setup() {
  createCanvas(960, 720);
  background(0);
}

function draw() {

let x = pmouseX+random(-10,10);
let y = pmouseY+random(-10,10);
let x1 = mouseX+random(-10,10);
let y1 = mouseY+random(-10,10);

describe('Set the line coordinates');

stroke('white');
strokeWeight(random(1,5));

line(x,y,x1,y1);
}
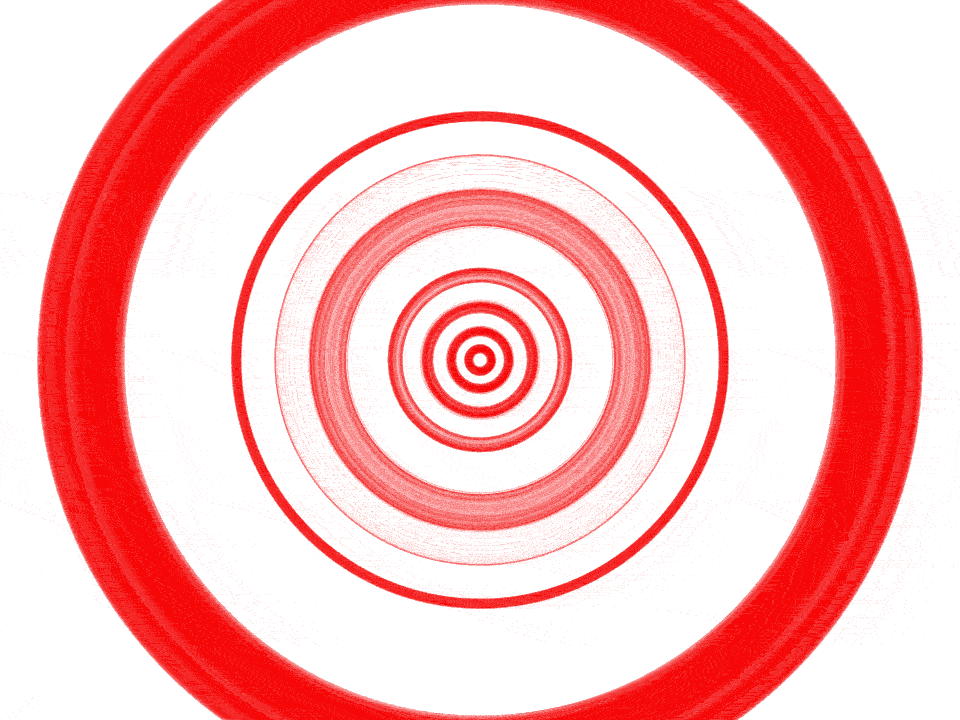
Genuary 19: Op art. #genuary19 #genuary2025 #genuary #processing #opart #eye #circle
Today I could find some time to push this simple generative op-art drawing tool, based on my ideas from the 2010's, with the particular detail of the stroke changing as you press your mouse. I love Op Art and it always makes me think of eyes, hence this particular shape, which also references my studio's logotype.
// Ariel Martín Pérez
// https://tainome.com/
// https://arielmartinperez.com/
// Documentation: https://processing.org/reference

import processing.pdf.*;

float radio, x, y, st = 0.25;

void setup() {
  size(960, 720);
  beginRecord(PDF, "op_art.pdf");
  fill(255);
  noStroke();
  smooth();
  rect(0, 0, 960, 720);
  fill(255);
}

void draw() {
  noFill();
  stroke(240, 0, 0, 20);
  strokeWeight(st);
  x = width/2;
  y = height/2;
  //noStroke();
  //fill(0,1);
  //rect(0, 0, width, height);
}

void mousePressed() {
  st = st + 1;
  if (st > 100) {
    st = 0;
  }
}

void mouseDragged() {
  noFill();
  stroke(240, 0, 0, 20);
  strokeWeight(st);
  radio=(mouseX+mouseY)/2;
  ellipse(x, y, radio, radio);
}

void keyPressed() {
  if (key == 'o') {
    endRecord();
    exit();
  }
}
Instructions: Copy and paste the code in Processing, save the sketch (Processing file) somewhere in your computer, run the sketch. Click on different parts of the screen to draw concentric circle shapes. When you're happy with the result, press key "o" on your keyboard. Then, the execution screen will close and a pdf file called "op_art.pdf" will appear on the same folder of your computer where you saved your Processing code file or "sketch".
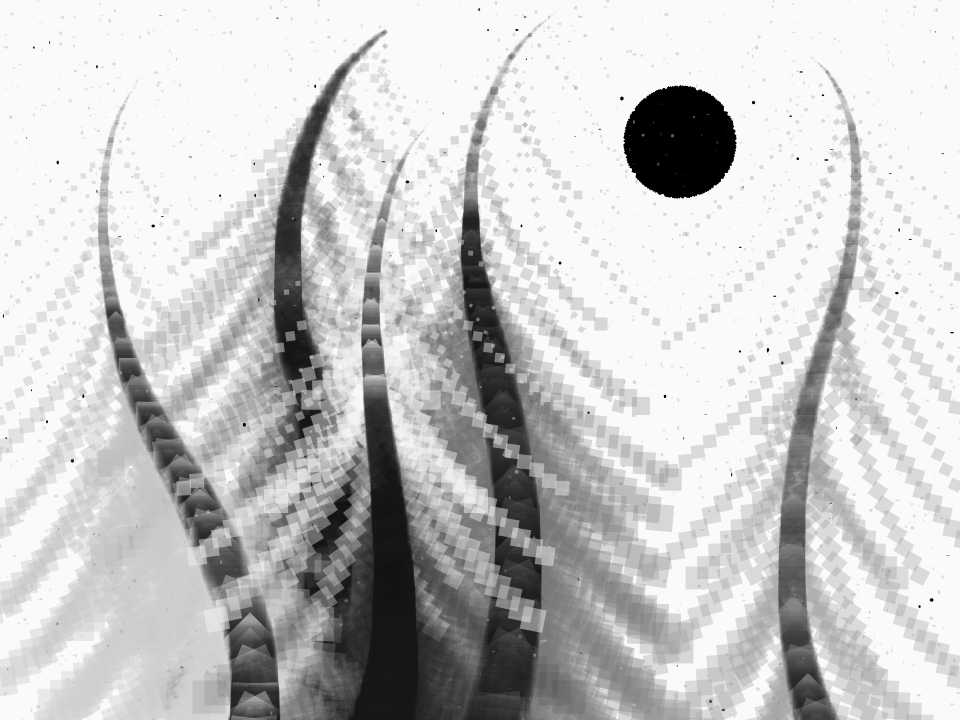
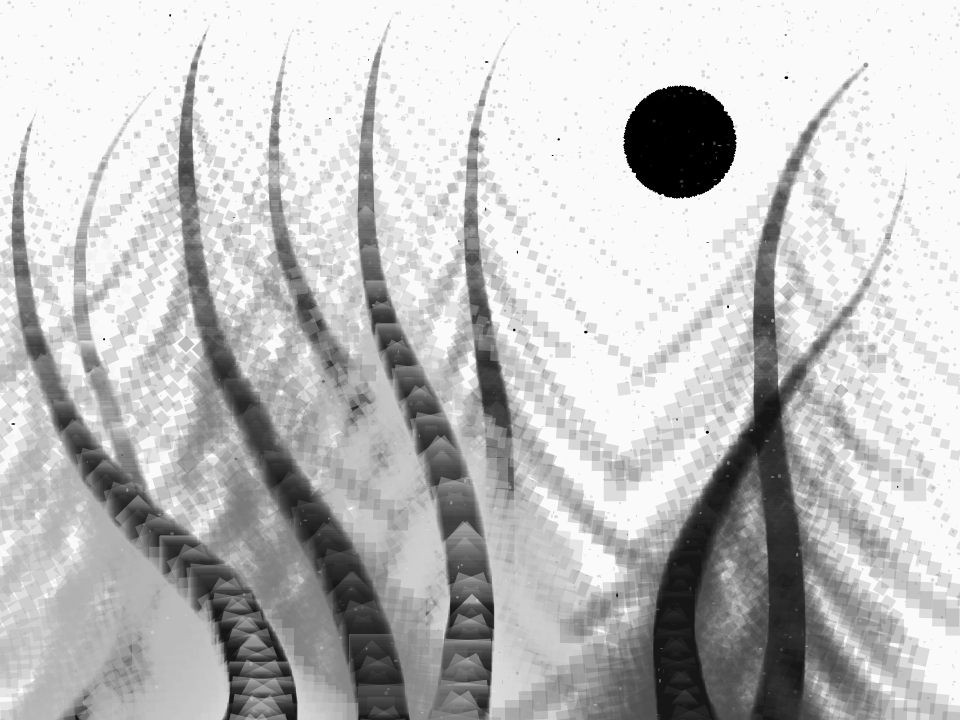
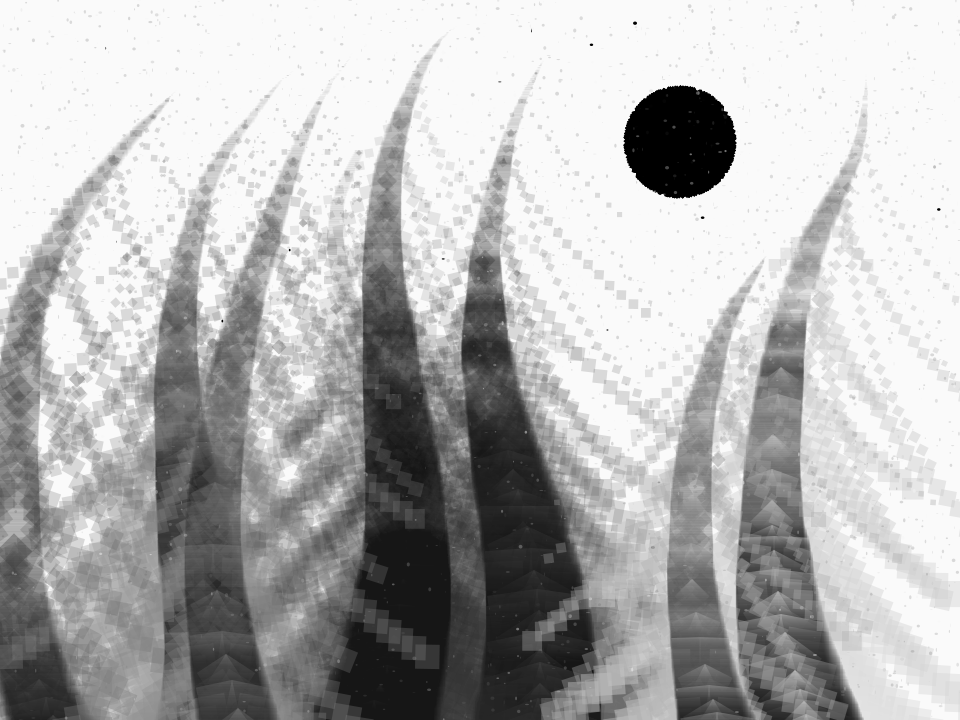
Genuary 20: Architecture. #genuary20 #genuary2025 #genuary #processing #architecture #hair #tentacle #forest
This one was a hard egg to crack. At first, I wanted to make something inspired by the Eiffel tower (clicking on the canvas would generate symmetrical structures formed by arching translucent squares). But it turned out looking more organic than intended, like a close-up of hair, underwater tentacles or an ethereal forest. Maybe one day buildings will be as delicate as filaments floating up in the air, bending but never breaking.
// Ariel Martín Pérez
// https://tainome.com/
// https://arielmartinperez.com/
// Documentation: https://processing.org/reference

import processing.pdf.*;

float x, y, s=4, c=20, a=45, t=0;

void setup() {
  size(960, 720);
  beginRecord(PDF, "architecture.pdf");
  fill(250);
  noStroke();
  smooth();
  rect(0, 0, width, height);
  fill(0);
  translate(width-280, 142);
  for (int i = 0; i < 360; i = i+1) {
    rotate(i);
    rect(0, 0, 40, 40);
  }
}

void spire() {
  x = mouseX;
  y = mouseY;
  s=s+0.1;

  rectMode(CENTER); //Change to "CORNER" to obtain thicker spires

  pushMatrix();
  translate(x, y);
  fill(10, 10);
  rect(0, 0, s, s);
  rotate(radians(a));
  fill(c, 20+c/2.5);
  translate(t, t);
  rect(0, 0, s, s);
  popMatrix();

  pushMatrix();
  translate(x, y);
  scale(-1, 1);
  fill(10, 10);
  rect(0, 0, s, s);
  fill(c, 20+c/2.5);
  rotate(radians(a));
  translate(t, t);
  rect(0, 0, s, s);
  popMatrix();
}

void draw() {
  ellipse(random(width), random(height), random(4), random(4));
}

void mouseDragged() {

  spire();

  c = c+0.1;
  if (c > 250) {
    c = 0;
  }

  a=a+1;
  if (a > 90) {
    a = 45;
  }

  t=t+10;
  if (t> 200) {
    t = 0;
  }
}

void mouseReleased() {
  s = 0;
}

void keyPressed() {
  if (key == 'o') {
    endRecord();
    exit();
  }
}
Instructions: copy and paste the code in Processing, save the sketch (Processing file) somewhere in your computer, run the sketch. Click and drag to draw dark, flowing filaments. When you're happy with the result, press key "o" on your keyboard. Then, the execution screen will close and a pdf file called "architecture.pdf" will appear on the same folder of your computer where you saved your Processing code file or "sketch". You can change the rectMode in the code from "CENTER" to "CORNER" to draw thicker tentacles.

Genuary 23: Brutalism. #genuary23 #genuary2025 #genuary #processing #brutalism #glitch #red
A very belated brutalist sunset landscape drawing tool, that I coded mainly while on the plane. I love brutalism buildings but in small doses, I couldn't stand living in a city where everything is just gray concrete blocks.
// Ariel Martín Pérez
// https://tainome.com/
// https://arielmartinperez.com/
// Documentation: https://processing.org/reference

import processing.pdf.*;

float x, y, w, h, c = 20;

void setup() {
  size(960, 720);
  beginRecord(PDF, "brutalism.pdf");
  fill(240);
  noStroke();
  smooth();
  rect(0, 0, width, height);
  fill(0);
  translate(width-280, 142);
  for (int i = 0; i < 360; i = i+1) {
    rotate(i);
    rect(0,0,40,40);
  }
}

void draw() {
  x = mouseX;
  y = mouseY;
  w = 2*(mouseY*0.2);
  h = height-mouseY;
}

void mousePressed() {
  c = random(100,200);
  fill(c,0,0);
  rect(x,y,w,h);
  fill(c-20,0,0);
  rect(mouseX,mouseY,mouseY*0.2,h);
}


void mouseDragged() {
  c = random(200,255);
  fill(c,0,0);
  rect(x,y,100,h);
}

void mouseReleased() {
  /*
  fill(240, 15);
  rect(0, 0, width, height);
  */
    fill(0);
  translate(width-280, 142);
  for (int i = 0; i < 360; i = i+1) {
    rotate(i);
    rect(0,0,40,40);
  }
}

void keyPressed() {
  if (key == 'o') {
    endRecord();
    exit();
  }
}
Instructions: copy and paste the code in Processing, save the sketch (Processing file) somewhere in your computer, run the sketch. Click anywhere to add brutalist-looking buildings (red shades are random, buildings are narrower the higher they are). Click and drag to draw glitchy-looking scarlet hills. When you're happy with the result, press key "o" on your keyboard. Then, the execution screen will close and a pdf file called "brutalism.pdf" will appear on the same folder of your computer where you saved your Processing code file or "sketch".
Genuary 24: Geometric art. #genuary24 #genuary2025 #genuary #p5js #square
Riffing on previous sketches, this very simple p5.js code will display two series of pulsating squares, one of the series grows faster than the other but after five cycles they sync up (best seen on a desktop browser). I would like to transform this into a rain drop ripple animation! Thanks Darren Kessner for the Processing to p5.js automatic converter!
// Ariel Martín Pérez
// https://tainome.com/
// https://arielmartinperez.com/
// Documentation: https://processing.org/reference

let s, t, x, y;
function setup() {
    createCanvas(960, 720);
    s = 2;
    t = 6;
    x = width / 2;
    y = height / 2;
    rectMode(CENTER);
}
function draw() {
    s = s + 2;
    t = t + 6;
    noFill();
    stroke(0);
    strokeWeight(0.5);
    rect(x, y, s, s);
    strokeWeight(2);
    rect(x, y, t, t);
    noStroke();
    fill(255, 10);
    rect(x, y, width, height);
    if (s > width) {
        s = 2;
    }
    if (t > width) {
        t = 6;
    }
}

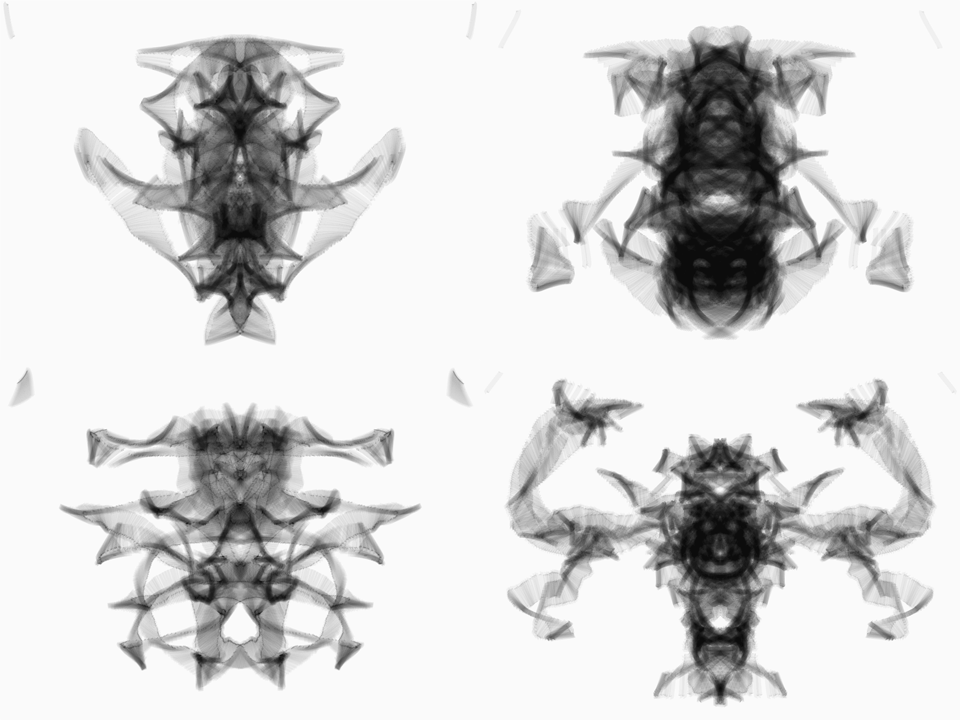
Genuary 26: Symmetry. #genuary26 #genuary2025 #genuary #processing #symmetry #biology #radiography #zoology
As the month comes to an end, I'm struggling more and more to keep writing at the same time as carrying all my daily life chores, so this is going to be the last installment of this series. If anything, this challenge has helped me get back on track with writing code in processing and I've explored some other languages in the process. I hope to rework some of this sketches next month, or to make some variations, or to revive some forgotten sketches from my 2010's folder.
This tool will allow you to draw symmmetrical drawings, the first movement that you'll make with your mouse will determinate the shape of your drawing tool (which is really that sets it appart from the other symmetrical drawing tools on Processing out there). I like that the brush tool looks kind of 3D and it reminds me a bit of the kind of drawings you can make on a ceiling with a lighter.
// Ariel Martín Pérez
// https://tainome.com/
// https://arielmartinperez.com/
// Documentation: https://processing.org/reference

import processing.pdf.*;

float i = 0;

float x1 = random(height)+pmouseX;
float y1 = random(width)+pmouseY;

float x2 = random(height)+pmouseX;
float y2 = random(width)+pmouseY;

float x3 = random(height)+pmouseX;
float y3 = random(width)+pmouseY;

float x4 = random(height)+pmouseX;
float y4 = random(width)+pmouseY;

void setup() {
  size(960, 720);
  beginRecord(PDF, "symmetry.pdf");
  background(250);
}

void drawHalf() {
  strokeWeight(10);
  stroke(0, 10);
  noFill();
  translate(mouseX, mouseY);
  curve(x1, y1, x2, y2, x3, y3, x4, y4);
}

void draw() {
  pushMatrix();
  drawHalf();
  popMatrix();

  pushMatrix();
  translate(width, 0);
  scale(-1, 1);
  drawHalf();
  popMatrix();
}

void keyPressed() {
  if (key == 'o') {
    endRecord();
    exit();
  }
}
Instructions: copy and paste the code in Processing, save the sketch (Processing file) somewhere in your computer, run the sketch. Click and drag to draw a symmetrical drawing. The first movement that you will perform with your mouse will determine the shape and direction of your drawing tool or "brush". When you're happy with the result, press key "o" on your keyboard. Then, the execution screen will close and a pdf file called "symmetry.pdf" will appear on the same folder of your computer where you saved your Processing code file or "sketch".
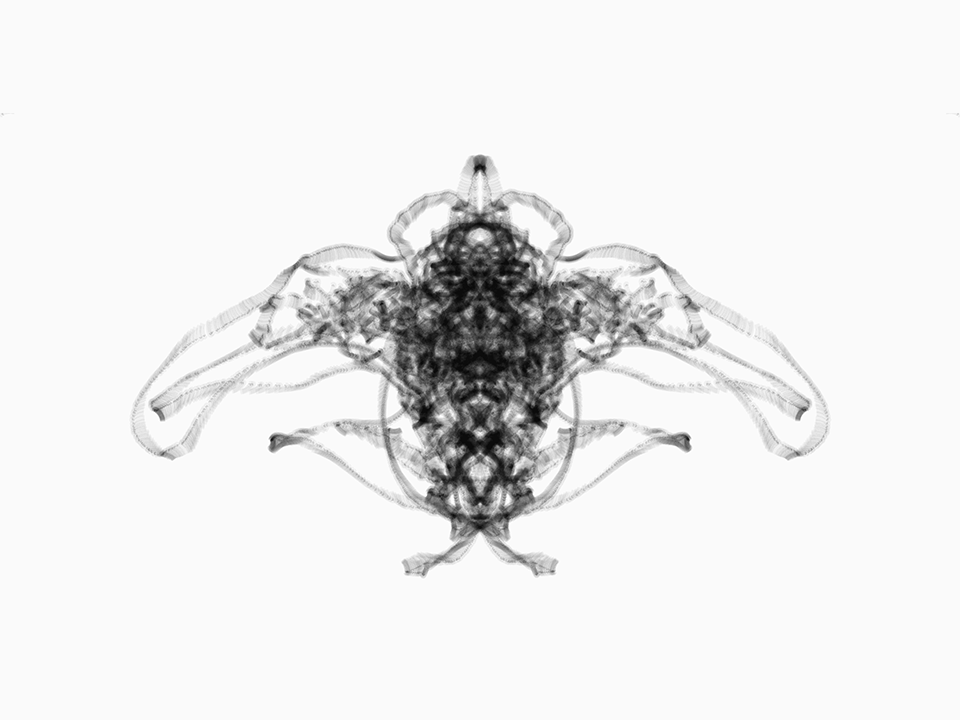
A variation of the previous sketch, this hard-to-use drawing tool will allow you to create translucent pictures that look like animal x-rays.
// Ariel Martín Pérez
// https://tainome.com/
// https://arielmartinperez.com/
// Documentation: https://processing.org/reference

PImage capturedImage;

float i = 0;

float x1 = random(height)+pmouseX;
float y1 = random(width)+pmouseY;

float x2 = random(height)+pmouseX;
float y2 = random(width)+pmouseY;

float x3 = random(height)+pmouseX;
float y3 = random(width)+pmouseY;

float x4 = random(height)+pmouseX;
float y4 = random(width)+pmouseY;

void setup() {
  size(960, 720, P3D);
  background(250);
  smooth();
}

void drawHalf() {
  strokeWeight(10);
  stroke(0, 10);
  noFill();
  translate(mouseX, mouseY);
  i=i+1;
  rotateZ(radians(i));
  curve(x1, y1, x2, y2, x3, y3, x4, y4);
  if (i == 360) {
    i = 0;
  }
}

void draw() {
  pushMatrix();
  drawHalf();
  popMatrix();

  pushMatrix();
  translate(width, 0);
  scale(-1, 1);
  drawHalf();
  popMatrix();
}

void keyPressed() {
  if (key == 'o') {
    // Capture the current screen to a PImage
    capturedImage = get();

    // Save the current frame as "symmetry.png".
    saveFrame("symmetry.png");
    endRecord();
    exit();
  }
}
Instructions: copy and paste the code in Processing, save the sketch (Processing file) somewhere in your computer, run the sketch. Click and drag to draw a symmetrical drawing. The first movement that you will perform with your mouse will determine the shape and direction of your drawing tool or "brush". When you're happy with the result, press key "o" on your keyboard. Then, the execution screen will close and a png file called "symmetry.png" will appear on the same folder of your computer where you saved your Processing code file or "sketch" (pdf [or svg] file recording in Processing isn't compatible with rotations of elements in the "z" axis).